Installing Vim Inside Visual Studio Code
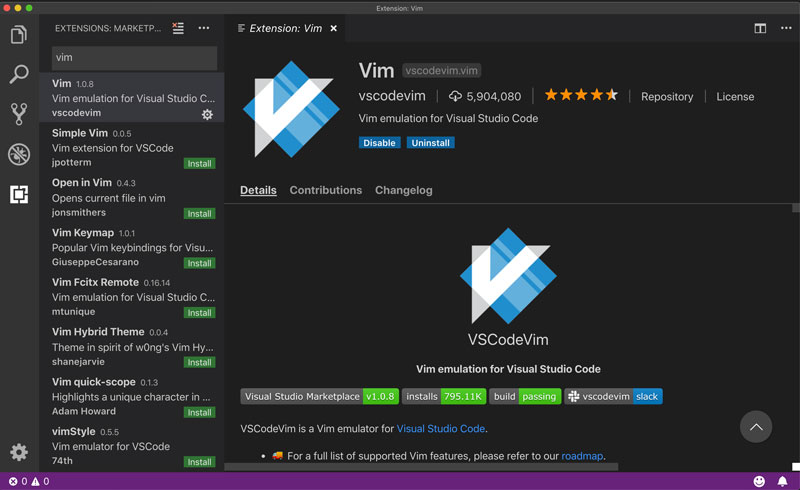
In order to bring the awesomeness of Vim inside Visual Studio Code you’ll need to install the VsCodeVim plugin:
- Open Visual Studio Code
- Go to Extensions
- Type
vimin the search box - The first plugin named Vim is the one you want (VSCodeVim)
- Click on the install button
- Epic Victory!

This is how you install VSCodeVim
After Visual Studio Code finishes installing the extension, you may need to restart it for the changes to take effect. latest-vscode
Have you restarted it?
Excellent! Open a code file from your latest project and look at the cursor. Does it look like a rectangle? Yes?
Then, Welcome to Vim!!
- Just as I was writing this book a new release of Visual Studio Code brought support for plugins working right of the bat as soon as you install them. But you never know… It always feels safer to reboot↩

Written by Jaime González García , dad, husband, software engineer, ux designer, amateur pixel artist, tinkerer and master of the arcane arts. You can also find him on Twitter jabbering about random stuff.
